
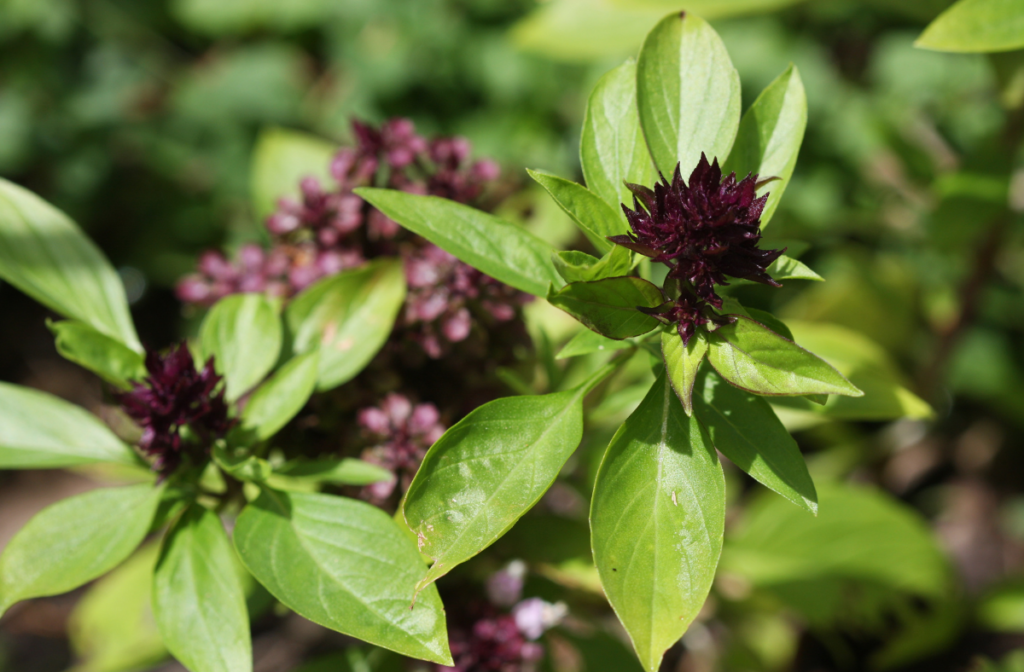
Thai basil but also sometimes referred as ‘Sweet Thai’, as the name suggests is abundant in Southeast Asia, particularly in Thailand. In terms of appearance, the stem of Thai basil is purple and it has small but narrow leaves. This plant can grow up to a height of between 12 to 18 inches and it’s leaves up to 1 to 2 inches long. Flavor-wise, it’s often compared to licorice and anise. It has some hints of spicy zest in it but compared to Genovese basil, Thai basil comes with a milder taste, and its aroma is similar to it’s distant cousin the sweet basil. The Thai basil is also grown for decorative uses as well.
There are different ways to enjoy this type of basil because there are so many Thai basil plant uses. You can add them to soups and curries to make simple dishes more flavorful and smell better. Basil gives off a minty and woody aroma. A popular ingredient to add among the delicacy and dishes of Thailand, Laos, Cambodia, and Vietnam. The fresh ones are also best for stir-fries, salads, and noodle recipes.
If you want to know how to plant them, we will share with you below the steps on how to grow Thai basil. We will also answer some of the commonly asked questions about them, like how to harvest Thai Basil and where to buy Thai basil seeds.
You can buy Thai basil from your local plant nursery or you can otherwise start from seeds. If you are planning to get a Thai basil at your local nursery, consider getting yourself a rosemary plant as well. Both rosemary and the Thai basil work well together and they enjoy the same requirements such as soil, water, and well draining soil for growth and productivity. No need for getting another type of soil.
How to Grow Thai Basil
Step 1: Put enough soil in your pot. If your pot does not have drainage holes, drill it. The amount of soil you will need depends on the size of your pot. With basil, you don’t really need to use large pots so a four-inch pot will be fine to use. For this pot size, it’s recommended to use a pint of soil.
In finding yourself a pot, any pot will do as long as they have drainage holes in the bottom. Not having drainage holes in the bottom can cause the soil to be too wet which causes the plant to drown or causing it’s roots to rot.
Purchase a high quality soil for your Thai basil to live on. Make sure the soil is a well draining soil and has a pH level somewhere in between of 6.5 to 7. Most store bought soils are neutral 7 which is perfect for your Thai basil, but if you want to double check use a pH level testing kit to do so.
Step 2: You can prep your seeds by soaking them in water overnight. It’s believed that this process helps the tiny seeds germinate faster. But it’s fine if you don’t prefer to soak your seeds before planting them. Sprinkle 2-3 seeds on the soil and press it gently.
You don’t need to bury the Thai basil seeds that deep, a ¼ inch soil on top of the seeds will suffice, enough to just cover the seeds. To give your Thai basil a push, use more organic compost instead if adding more soil.
Step 3: Like most basis, the Thai basil is a sun loving plant and it can’t tolerate cold climates. So place it in a location where it can get up to six hours of sun exposure per day. Basil grows quickly in warm soil. Water the base and not the leaves once a week.
If you live in an area with winter seasons and you want to plant the Thai basil outdoors during spring, if so prepare the Thai basil beforehand. You can do this by preparing and planting the seeds indoors three to four weeks before the frost ends.

More Tips on Caring for Your Thai Basil
Thai basil seeds can be planted at any time of the year. But if you live in a place where you experience winter and spring, it’s best to plant them during the last days of the winter season and at the onset of spring. Basil seeds do not only thrive in warm soil but also in warm weather.
Many experienced gardeners add compost soil or natural fertilizers to their herbs. Your herbs benefit from getting fertilizers and compost now and then because they have a range of nutrients for their proper growth.
To encourage your Thai basil to be bushy for the highest yield of leaves output, prune the tip of each branch starting in early summer. Do this once the Thai basil is at least 6 inches tall. However, if you only want to grow your Thai basil for decorative purposes, then don’t prune it as that will stop the flowers from growing and blooming.
You can buy the fertilizer from plant stores and you can also make your own from home. Some items are already available in the pantry. Examples of items you can use as natural fertilizer are coffee grounds that you previously used, and used tea bags, and even eggshells.
The most probable reasons why basil dies are overwatering and underwatering. If your herb appears wilting, you might want to check for signs of disease such as stunted growth and brown spots on the stem.
Just like us humans, our plants also experience stress when they don’t get the proper care required for them. You may also want to watch out for pest because they are other common causes of a basil plant to wilt or die.
The biggest concern about planting basil is they hardly grow back, sometimes it may take a year to see them grow big again. Perennial herbs grow back again after a year; annuals require more work.
Thai basil is considered a short-lived perennial regardless if you live in a frost-free region. It grows fast but it can also die fast. Otherwise, you may want to replant your herb in a place where it will get enough sun exposure.
How to Harvest Thai Basil
The best time to harvest the leaves of your Thai basil is during in the morning where their essential oils are at their peak and it’s flavor is at it’s premium. Also prior harvesting the Thai basil, it is best that you cut off the flowers days before the harvest to encourage the yield of the leaves.
To harvest your basil, trim a quarter of an inch above the node. When handling the leaves, make sure to handle them carefully because they can get bruise easily. Store your fresh basil in the refrigerator to keep it fresh. Another method you can try is covering the herbs in a paper towel then storing it in a glass with around an inch of water. When you’re ready to use your herb, simply rinse it with water. To maximize its shelf life, add it in oil and freeze. You can store it in the freezer for up to six months.
Thai Basil Plant Uses and Benefits
This type of basil can be used interchangeably with other types of basil, such as sweet basil when you don’t have any of them in the pantry. In fact, it is more stable under high temperatures. It stays firm even if you extended your cooking for a few minutes.
Thai Basil seeds are said to have antioxidants and anti-bacterial properties. The chemicals in it are also believed to be helpful in fighting cancer, virus, and fungi.
If you’re suffering from stomach spasms, you can drink basil tea. It also relieves other tummy problems such as appetite loss and gas. Because it has antifungal properties, you can also use basil to treat insect bites.
Conclusion
Thai basil is a nice addition to any garden because it’s one of the most versatile kitchen herbs. The recipes where you can include basil are endless. You can use it for making pesto, salad, and pasta. What more, you can add it when cooking vinaigrette and salsa.
Aside from its many uses for cooking, it also features so many health benefits. Basil tea, for example, is easy to do. It provides relief to stomach problems. All you need to do is bring water and basil leaves to a boil. Then add some lemon zest and honey to your basil leaves for an instant healthy drink. With these tips we shared above, we’re hoping you can grow your own basil from home. Just remember, growing your own herbs may require lots of research and patience. But once you have seen your basil grow, all your sacrifices will be paid off.

